A quote allows you to estimate goods and services for a client before work begins by outlining the scope, terms, and pricing. Once the client approves a quote, you can convert it into a regular invoice. Let's see how this works.
-
You create a quote as an initial proposal for a client that contains details like the estimated list of products and services, the validity period, and the payment terms. For example, you could bid on a project with fees locked for 30 days starting July 1st.
-
Once you are ready, you send the quote to the client for review. The application tracks the lifecycle of the quote through different statuses (such as Draft, Sent, and Accepted) so you always know where negotiations stand.
-
When the client approves the proposal, they accept the quote. The application records the acceptance date, allowing you to seamlessly transition from the planning phase to the billing phase.
-
You convert the accepted quote into an invoice manually. New invoices are not created automatically, but only manually, so you can review the line items and maintain total control over the billing process.
The date of the new invoice can be set to the day you perform the conversion.
-
Once a quote is successfully converted, its workflow is complete, and it serves as a permanent commercial reference point for that regular invoice.
Quotes are optional and can be enabled from .
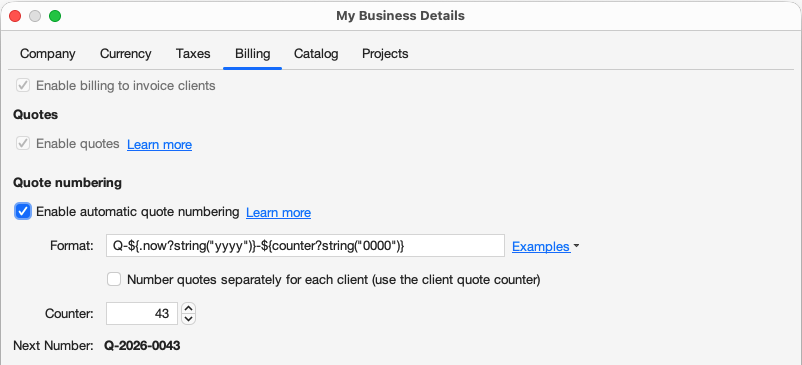 |
Quote settings
After enabling quotes, you can enable automatic quote numering so that each time you create a quote, a number is generated for it automatically.
Quotes can be numbered sequentially for all clients or separately for each client. If you need to number quotes separately for each client, Fanurio will use the quote counter defined at client level. The quote counter of a client is incremented only when an quote is created for that client. Edit a client and go to the Billing tab to access its quote counter.
Enabling quotes will add the Quotes view to the application.
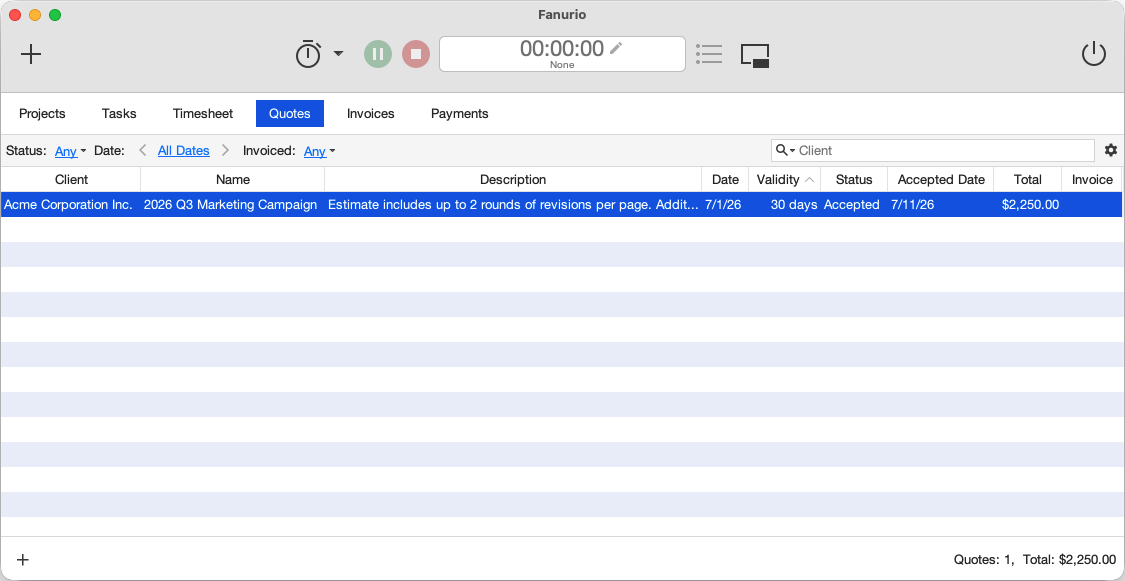 |
Quotes view
Use the filters in the table header to customize which quotes are displayed. The table footer will dynamically calculate and display the totals for the filtered results.
To create a quote, select from the menu.
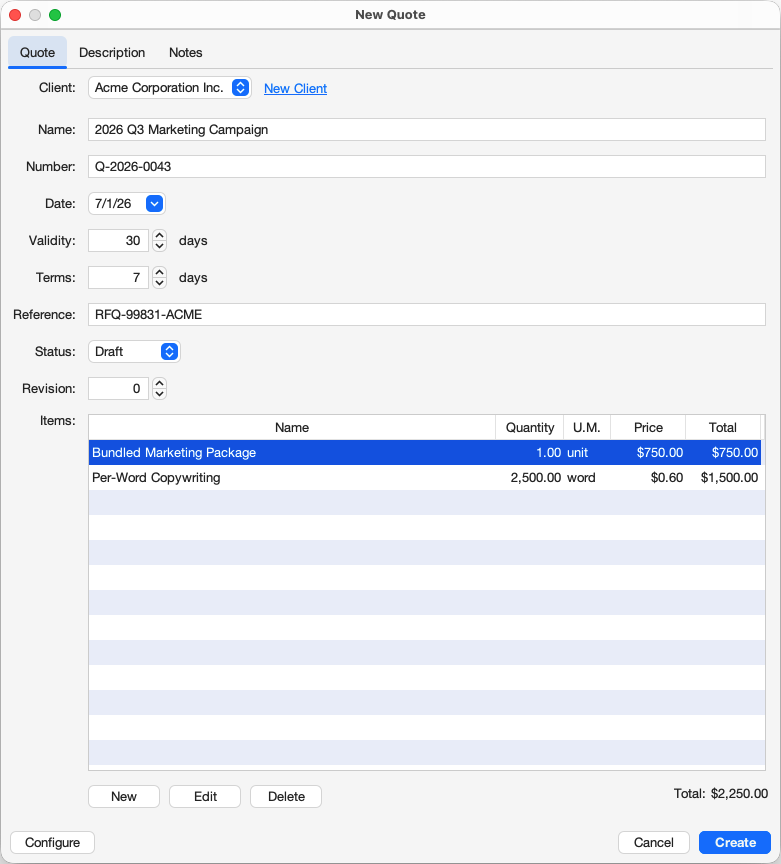 |
New Quote window
The following fields need to be filled-in for a new quote:
-
Client [mandatory]: The client for whom the quote is created.
-
Name [mandatory]: A name or a short description for the quote.
-
Number [optional]: An identifier for the quote. You can either enter them manually or generate them automatically.
Quote numbers are optional but they are visible by default.
-
Date: The date the quote is issued.
-
Validity: The number of days the quote remains valid since it is issued.
-
Terms: The payment terms that will apply if the quote is invoiced.
-
Reference [optional]: An external reference number, such as a Request for Quote (RFQ) number.
It can be useful if you need to include it on exported quote documents or if you need to find the associated quote later.
-
PO Number [optional]: The purchase order number associated with the accepted quote.
-
Status: The current state of the quote. It can be one of the following:
-
Draft: You are still working on the quote; it's not ready to be sent to the client.
-
Sent: You sent the quote to the client for review.
-
Accepted: The client has accepted the quote; work can begin.
-
Rejected: The client has rejected the quote; no further action will be taken.
-
Cancelled: You withdrew the quote; no response is expected from the client.
-
-
Accepted Date: The date the quote was officially accepted by the client.
-
Revision: An internal number used to track multiple versions of the same quote. It must be incremented each time a new version is sent to the client for approval.
-
Currency: The currency applied to all quote items. This field is visible only if the business is configured to use multiple currencies.
-
Item [mandatory]: The items for the quote. The quote must have at least one item.
-
Taxes: Specifies taxes applied to taxable items of the quote by default. These taxes are applied to taxable items whose taxes were set to Default.
This field is visible if taxes are enabled at business level and the client is not exempt from taxes.
-
Description: A detailed overview of what the quote covers.
-
Notes: Additional comments or detailed specifications for the quote.
Optional fields like Number or Reference can be made visible by clicking the Configure button from the bottom-left corner.
You can also create a new quote by duplicating an existing one. To do that, go to the Quotes view, right-click (ctrl-click on macOS) the quote you want to duplicate to show the contextual menu and select Duplicate Quote .... The number, date, status, revision, reference and purchase order number fields from the new quote are reset, all other fields are copied from the duplicated quote.
To send a quote to a client for review, you must first export it. The available export formats depend on the type of template you use. For example, the built-in HTML template allows you to export quotes to .html and .pdf.
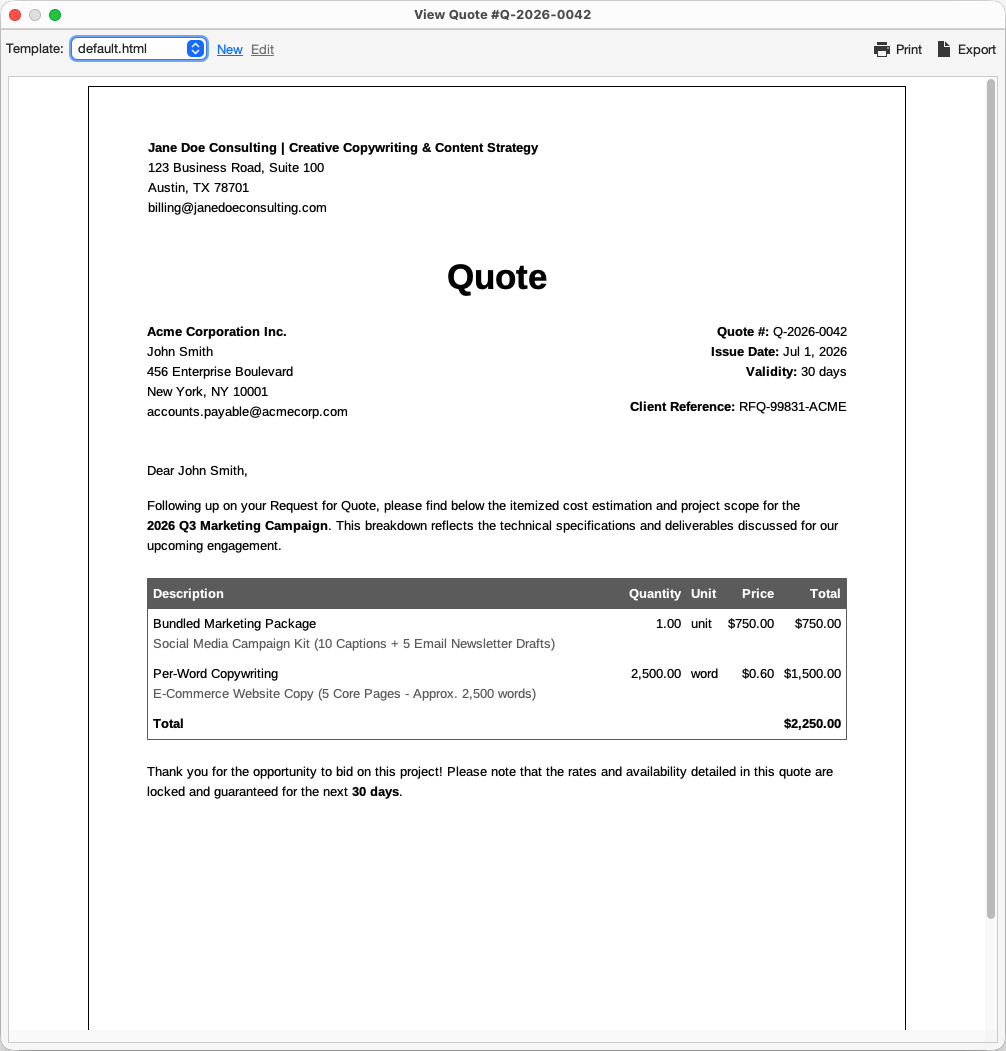 |
View Quote window
You can either export a quote directly:
-
Go to the Quotes view,
-
Right-click the quote you want to export to display the contextual menu,
-
Select Export Quote.
or from the view window:
-
Go to the Quotes view,
-
Double-click the quote to view it,
-
Click the Export button to export it.
If the default template doesn't match your needs, you can create a new one. Click in the View Quote window or access from the menu to open the template editor and create a new template. For a complete list of fields that you can use in a quote template, refer to the quotes and quote items placeholder documentation.
After a quote was accepted by the client, it can be converted into an invoice. Right-click (ctrl-click on macOS) the quote in the Quotes view and select "Convert to Invoice" from the contextual menu to convert it. The quote settings and its items will be used to create the invoice.
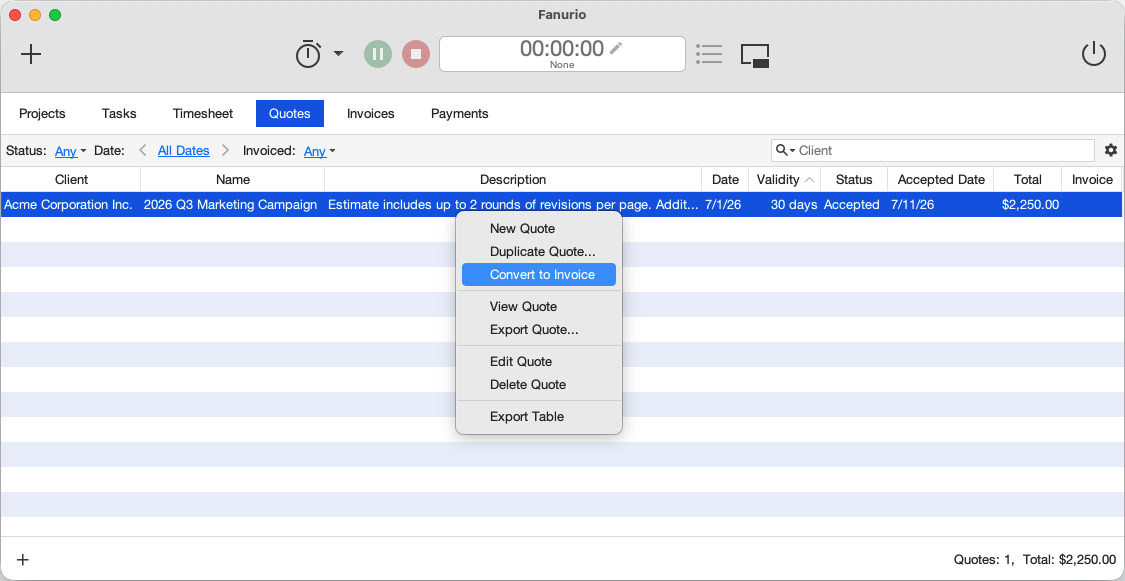 |
Convert quote to invoice
If the quote status hasn't been changed to Accepted, you will be asked to change it first.
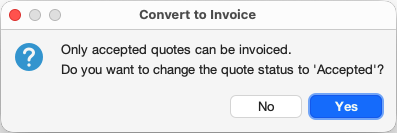
Mark quote as accepted before converting it into an invoice
Once invoiced, quotes can't be invoiced again. Also, invoiced quotes can't be deleted unless their invoices are deleted first.
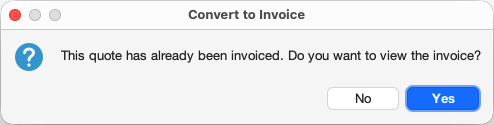
View quote invoice
Invoiced quotes are displayed in gray in the quotes table and the invoice number is displayed in the Invoice column. To find a quote by its invoice number, use the search field above the quotes table.
Quote invoices are displayed in the Invoices table alongside all other invoices. The only difference is that they include the corresponding quote number in the Quote column.
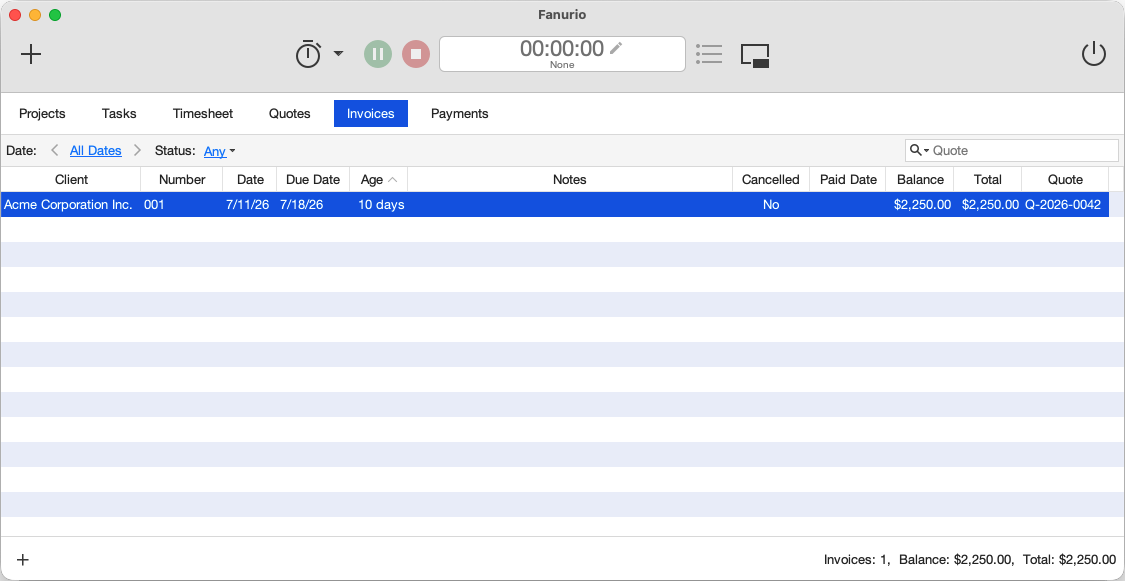 |
Quote invoice
To find an invoice by its quote number, use the search field above the invoices table.